When you onboard new users to your platform, you often need more than just an email and password.
Maybe you want to know:
-
Is this user joining as a buyer or a seller?
-
What are their interests or preferences?
-
Do they belong to a specific business category?
-
Or maybe you need their location, phone number, or other custom info for your operations.
This is where User Attributes in Tradly come in. Attributes let you customize the onboarding flow and collect additional data that makes your marketplace or community more powerful.
 Why Use User Attributes?
-
Personalization → Show the right content/products based on user interests.
-
Segmentation → Group your users (e.g., sellers vs buyers).
-
Validation → Collect extra details before approving sellers (like ID, license number, etc.).
-
Better Recommendations → Use preferences to recommend products, services, or communities.
-
Future-proofing → Collect data you may not need today but could be critical later (like industry type, age group, etc.).
 How to Create User Attributes in Tradly
-
Login to Super Admin
Go to your Super Admin dashboard. -
Navigate to User Settings SuperAdmin - Tradly - No-code builder to Configure your Platform
Super Admin > User > User Attributes -
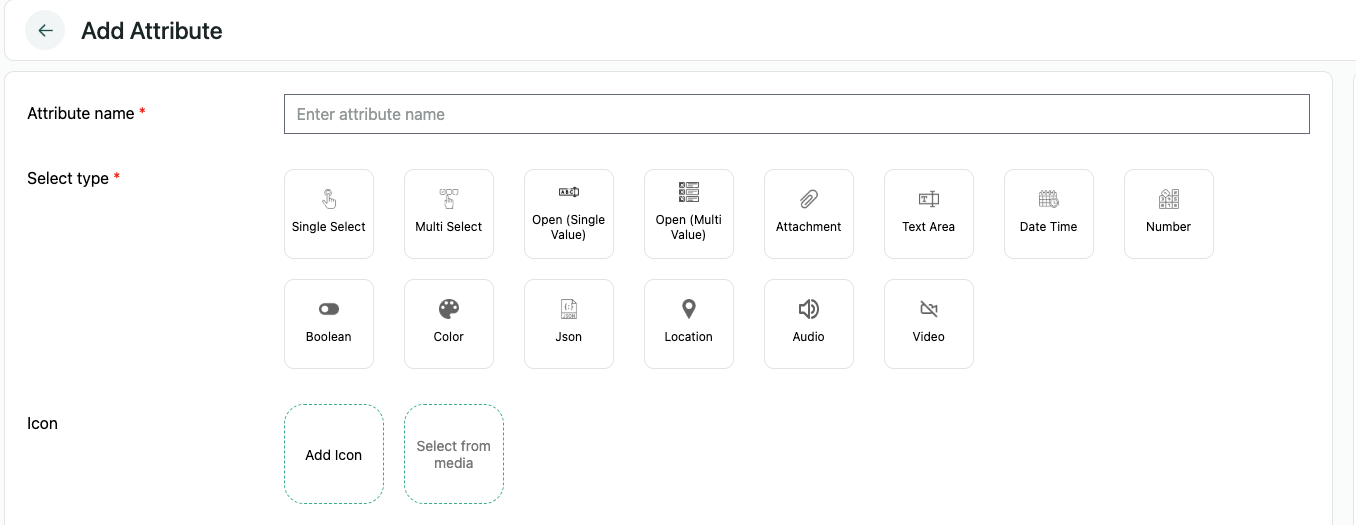
Click “Add Attribute”
Here you can define a new attribute (e.g., “Are you joining as a Buyer or Seller?”). -
Set the Metadata
When creating an attribute, Tradly automatically adds a metadata field called:signup = true-
 If true → The field will appear on the signup page.
 -
 If changed to false → The field will appear only in the Edit Profile page (users can update it later).
Example: “Business License ID” may not be ideal at signup but perfect in Edit Profile.
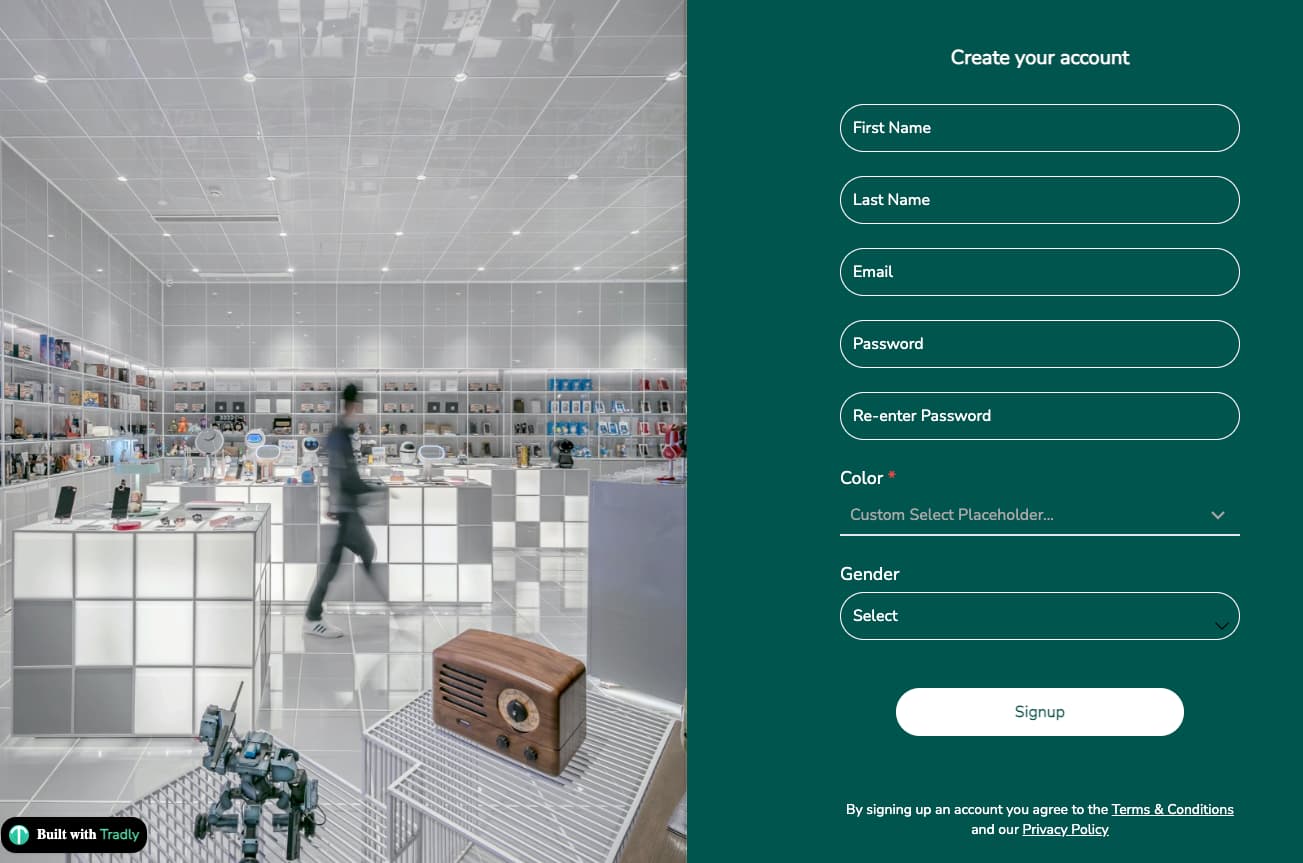
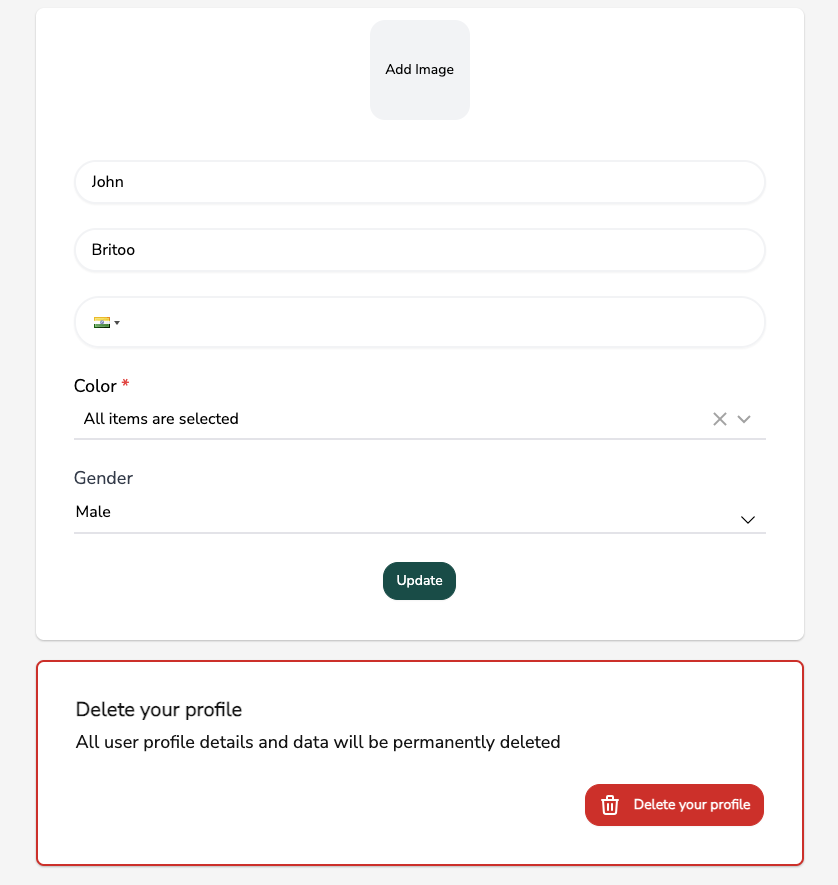
Output Signup Page and Edit Profile Page
-
 Example Use Cases
-
Buyer vs Seller Selection → Ask during signup, then customize their dashboard accordingly.
-
Category Preference → Let users pick categories (e.g., fashion, sports, tech) so they see relevant listings first. (Note: The recommendation & Matching system is currently in progress for you to configure and build recipes)
-
Business Details → For sellers: collect company name, registration number, or tax ID.
-
Location Info → City, country, or delivery area for better logistics.
-
Custom Preferences → Ask things like “Do you prefer new or pre-owned items?”
 Pro Tips
-
Keep signup fields short and simple → move complex data to Edit Profile.
-
Use attributes to unlock features (e.g., sellers must fill business details before listing products).
-
Think ahead → collect data that will make future marketing, segmentation, and analytics easier.
![]() That’s it! With User Attributes, you’re not just collecting signups—you’re building a data-rich user base that fuels personalization, trust, and growth.
That’s it! With User Attributes, you’re not just collecting signups—you’re building a data-rich user base that fuels personalization, trust, and growth.
All the data you collect through user attributes can be sent via Tradly webhook to other systems (e.g., Zapier → Marketing automation tools).
If you have any challenge in implementing this, let us know.